
Rooms & Locations are important if:
Step 1
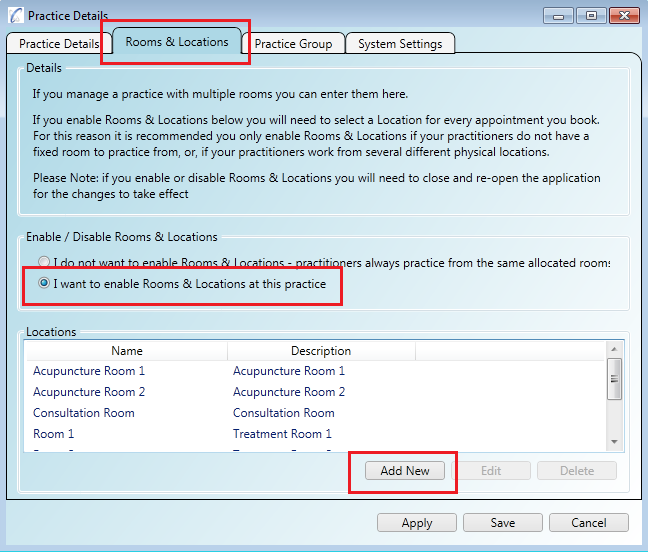
Open the administration screen 'Administration/Practice Details' and click on the 'Rooms & Locations' tab.
Step 2
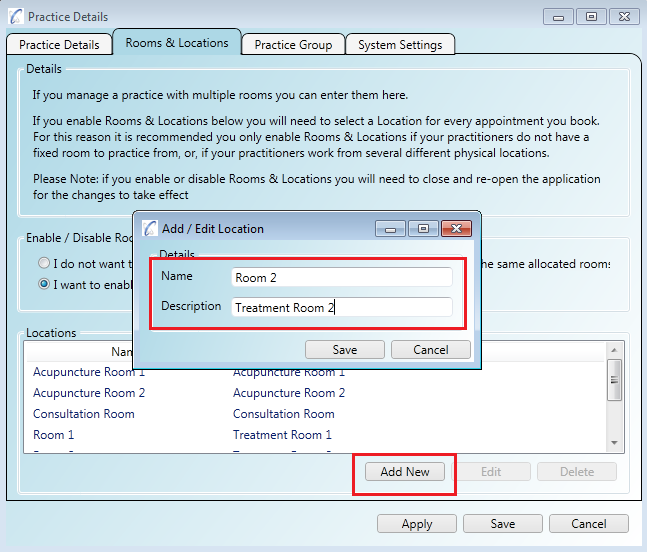
Click on the 'Add New' button at the bottom and fill in the details. You can create a new room in your main practice, or a new physical location for another practice you may work
at during the week.
Step 3
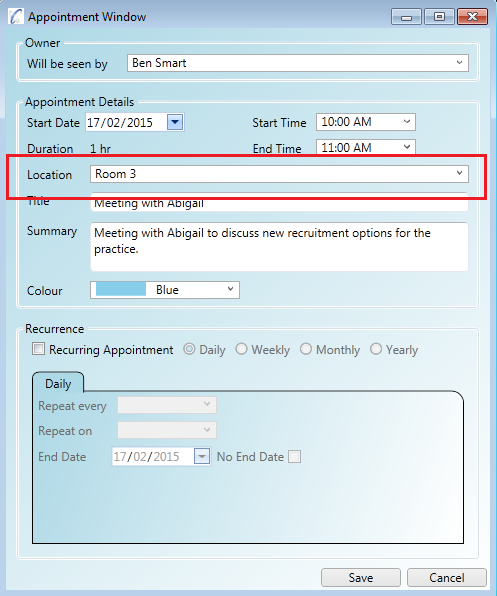
When booking a new appointment in the application you will need to assign it a Location.
Step 4
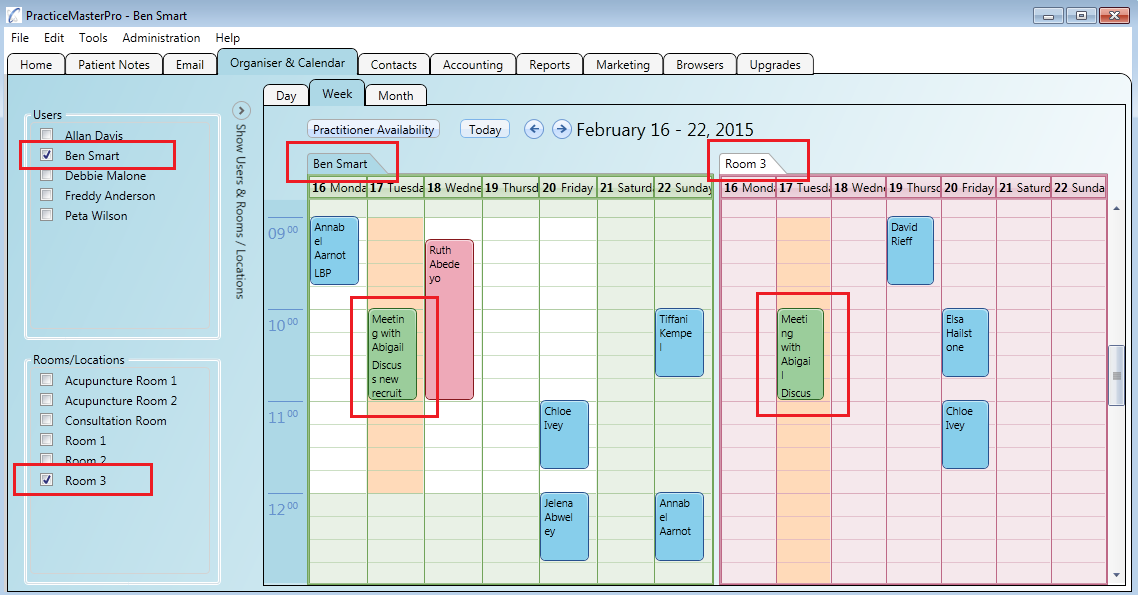
On the main calendar you can view appointments by practitioner as well as by room.
If you have set up your locations as physical practice locations instead of rooms (or as well as rooms) then you can tie them to your online bookings through your work hours.
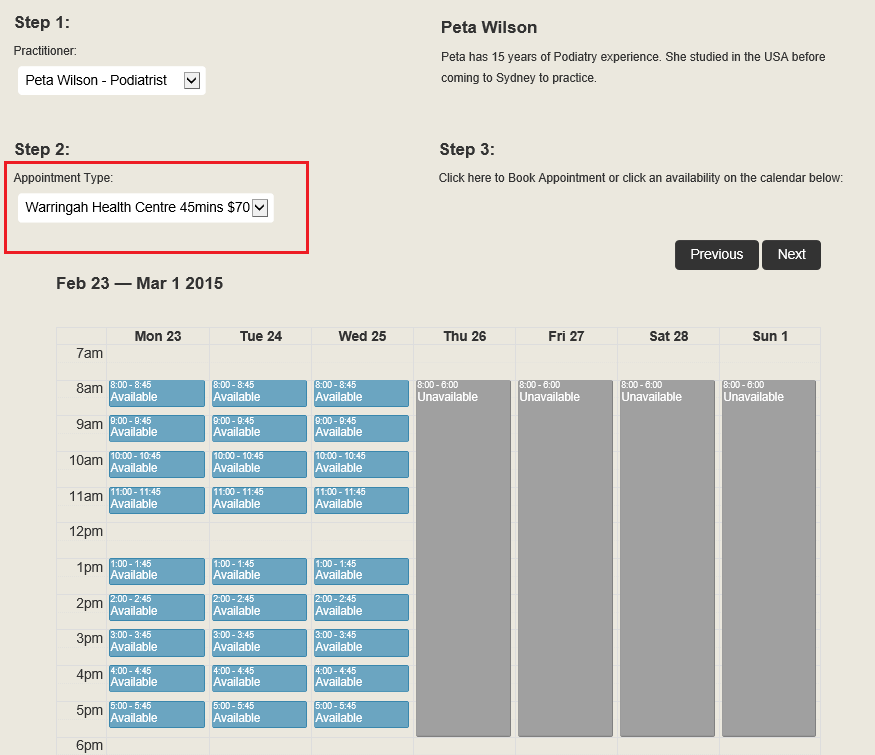
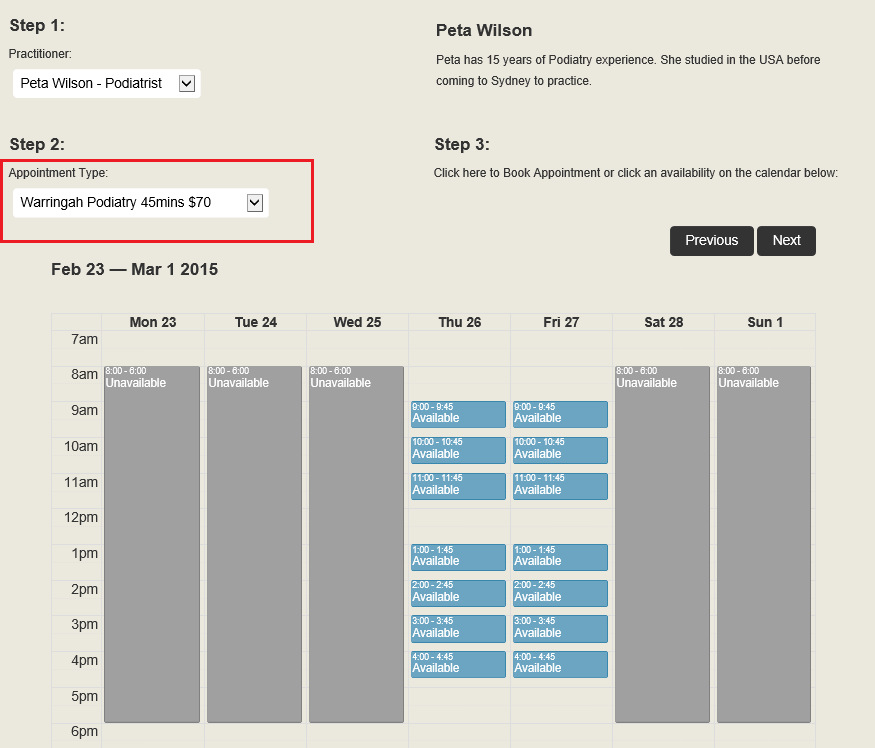
For example, if you work from "Warringah Health Centre" on Monday, Tuesday and Wednesday but work from "Warringah Podiatry" on Thursday and Friday you can set this up through 'Appointment Types' linked to your work hours.
Step 1
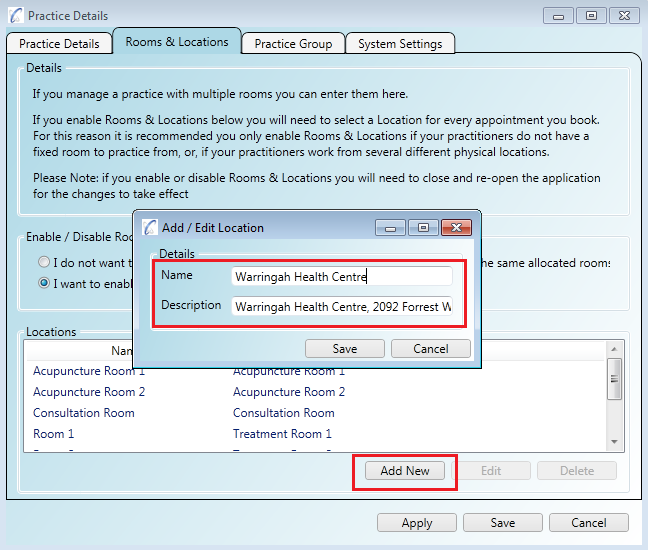
Open the 'Administration/Practice Details' menu and click on the 'Rooms & Locations' tab. Click the 'Add New' button at the bottom and enter
the details of the practice's physical location.
Step 2
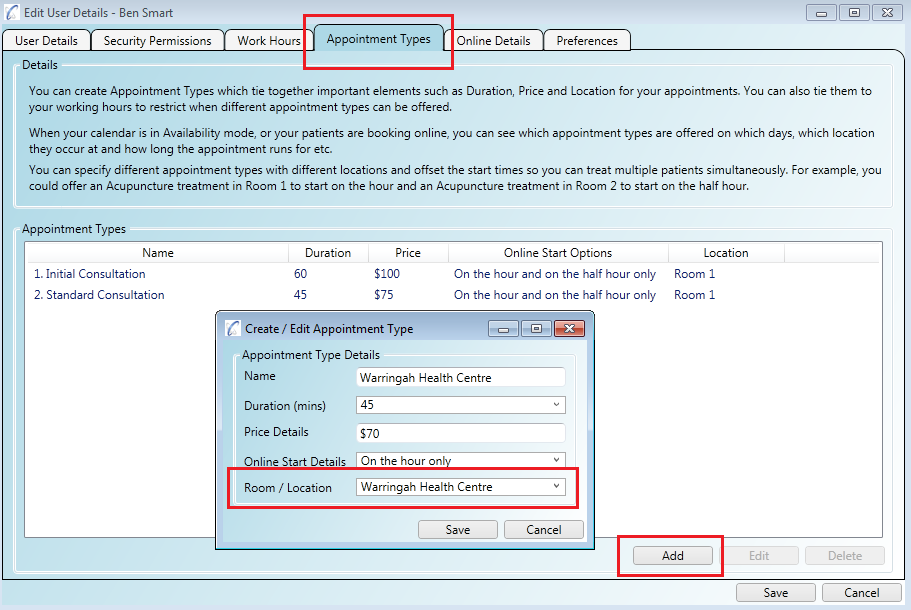
Open the 'Administration/User Details' menu and double click the user you want to apply the locations to. Click on the 'Appointment Types' tab, then click on the
'Add New' button at the bottom to create a new 'Appointment Type'.
Step 3
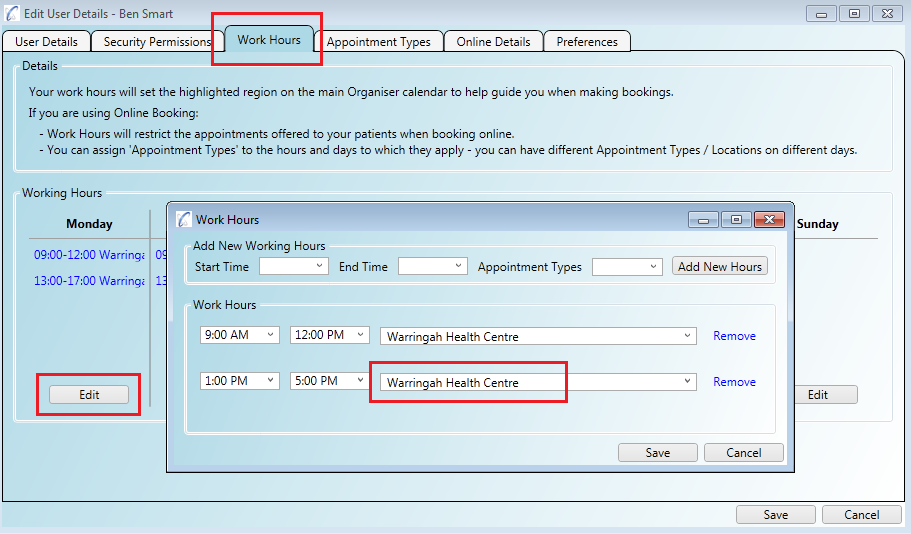
Click on the 'Work Hours' tab and click the 'Edit' button to assign the 'Appointment Type' to your work hours.
Step 3
When your patients book online they will be able to select the practitioner in 'Step 1' and then the appointment type in 'Step 2'. The different appointment types will only
allow bookings to be made against their location. Also, as the appointment types were assigned to work hours the different locations will only be available on certain days.
